Building Web Authority with Feature Articles or Link Bait Articles

Nancy McCord is in Russia for the next several weeks. This article is a reprint from one of her published articles.

If white papers are not for you as mentioned in our previous post then feature articles or link bait articles may be the best option for you. With these types of articles, you can easily pay a good web content writer to create a 600 to 800 word article for you on topics that dovetail with the services you provide.

Once created, you can register the articles with a variety of article directories for syndication on other websites, in ezines, or on other blogs. The articles will provide a one-way inbound link back to your website and will appear in Google on the article directory site.

For some clients, we recommend the additional installation of an article directory back on their website as a repository for this created content. If your blogger has written these articles, the research and topics will provide additional content creation opportunities. Additionally these articles can be pointed to by links from within your own website and blog either at the article directory or in your online article repository.

By cross linking all you do with specially created content, you help to point search engines to the content that builds your own authority.

Personally I have found that Google does not really factor in the one way inbound links that you get from article directories to improve your organic position with this technique, but Yahoo and MSN will move you up on the search results page with feature articles registered at the various article directories.

Now the very pointed question, if doing articles, which can be costly, doesn’t help you with Google placement why do them, you should do them to create authority for your website. This is one reason why we recommend an article repository back on your own website; so you build credibility in your readers’ eyes as well as for search engines. We know that articles of this nature do not give you an important immediate organic boost, but much of what builds authority and organic placement is not about immediate results but long-term results for readers PLUS search engines.

Press Release Writing Seems Easy, But Is It Really?

We’ve started writing press releases again after a several month hiatus. Writing a good press release is a real art and requires a different mind set than either blogging, content writing, or creating marketing content.

Press releases are best written in a third person, objective, informational tone. It is not unusual for me to spend two hours to three hours in writing a press release. The wording has too be dense yet creative, simple yet engaging, and informative and not too self serving.

That being said some of our press releases have really gotten our clients noticed. One press release got one of our client’s a call from a buyer at the Shopping Network, another got a phone call from Inside Edition, and another got an interview in a news piece that was nationally syndicated over 50 television stations on the nightly news.

Not every press release grabs the mainstream media attention, but a well-written press release on a topic that is trending can reap big rewards with free press and news media coverage.

When I write a press release I use the format that PRWeb, my favorite supplier, uses – the who, what, where, when approach. I always use a title, summary, and about closing complete with contact information. I find that that is the most concise and professional format.

Client’s sometimes get confused on press releases. They are not marketing pieces (well not like the typical marketing piece), they are not stories, they are not white papers, and they are not blog posts. Press releases are short pieces that put a newsworthy event in a easy to understand concise format to try to engage the media. I find it important to always have an angle to use as an approach. Sometimes with the right angle you can attract a national news audience.

To check out samples and pricing for our press release writing services I invite you to visit http://www.mccordweb.com/copywriting/press-release.php.

Allison Pest Control Launched

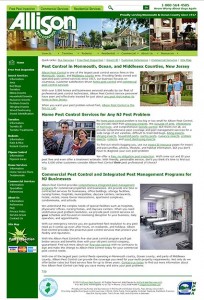
Allison Pest Control New Custom Website
Custom website for Allison Pest Control

We’ve just launched a brand new website for the nice people at Allison Pest Control in Farmingdale, New Jersey. The site took over 130 hours to complete and I believe it is one of our best so far.

The site contains 33 custom created pages chock full of interesting well-written content about New Jersey pests. The website contains a variety of navigation styles as well as an integrated site search feature that make finding any topic easy on the site.

Using the greens and logo from the client’s trucks, we created a custom look that pleased the client and looked crisp and clean. The site is built as an authority website and is geared up to place well organically on local search terms.

With additional service areas created in the new site, both commercial and residential clients will find topics of interest and service information. Adding numerous client testimonials in both the home and business areas helps readers and prospects to better understand the type of services the client, who has been in business since 1917, offers.

The client has already started to get outstanding feedback and is already planning on adding a blog to the website in the next several weeks. We invite you to check out this new website and see what you think at www.AllisonPest.com.

How to Add a Blog Post to WordPress

If you have never used WordPress sometime how to add a post is extremely confusing and especially if you want to publish on a future date. Here are the steps that we teach to our new blog writers on how to add a post.

Download and install IE Spell for your browser as many WordPress control panel spell checkers are not functional.

Visit www.IESpell.com. This little spell checker is then accessed from your tools menu. If you use Firefox, do a Google search and download a plug-in that you can use for spell checking.

Login to the blog control panel. You will be on the blog dashboard page once logged in.

Click Posts in the left side bar. The blog listing screen will open. If you have a draft post or pending post you will see it in the links on top of the blog post list.

To create a new blog post click Add New in the post menu in the left sidebar. The next screen will show the blog post entry control panel.

This is crucial – if you have created your blog post in Word or used one from the client, you MUST copy your post, paste it into Notepad, and then copy it from Notepad and then paste into the blog entry field. If you do not do this you will carry hidden font and character styles into the blog post which will be visible when published. You can typically access Notepad from the Accessories menu on your computer in your Microsoft Office products.

Once on the blog post control panel, type in or paste your blog title in the very top one line field. Paste in from Notepad or create your blog post in the larger box underneath the blog title.

To insert a link in your blog post, open another browser tab, go to the web page that you will want the link to direct to, copy the address from the address bar, must include the http:// in front of the link. Go back to the WordPress control panel and using your mouse drag to highlight the text you want to carry the hyperlink. I like to drag from the end of the phrase to the front to have better control over the link and so a space in not inadvertently picked up in the link. Then click the chain or hyperlink icon in the tool bar just above the post entry field. A small window will pop up, paste the link into the very first field overwriting the http:// that is already there, select in the drop down, open link page in a new window, and then click insert. WordPress will then underline and hyperlink your text in the blog post.

Make sure to spell check your blog post using IE Spell.

On the right side bar now create tags in the tag field that are keywords to find your blog post. I use all lower case for tags unless it is a proper name. I usually select one, two or three words based on the blog post.  Make sure to click Add.

Then look just below the tag field and select categories. Categories are like blog navigation so be judicious in adding them. All categories should be proper case.

In the top right box that says publish; look for Publish Immediately and EDIT. Do not click any other buttons at all like draft pending review or okay.

Click the Edit link to open the publish time calendar. If you are publishing ahead, change your date and time. I like to set the clock to 5:00 am as the publish time if I am scheduling a blog post ahead so it is there the first time someone looks. After setting the date and time, click PUBLISH. This is important to not click the okay button or preview button as your post may end up as a draft and not properly scheduled. After you have clicked publish you can go back to the blog post master page and click your blog post to preview it.

Always make sure you preview your blog before you log out to make sure you don’t have any funny characters and that your spacing is correct and images are in place.

To double check that all is well, click Posts on the left menu you will see your blog post in the link at the top that says scheduled and also in the blog post list with a countdown of hours until the publish time.